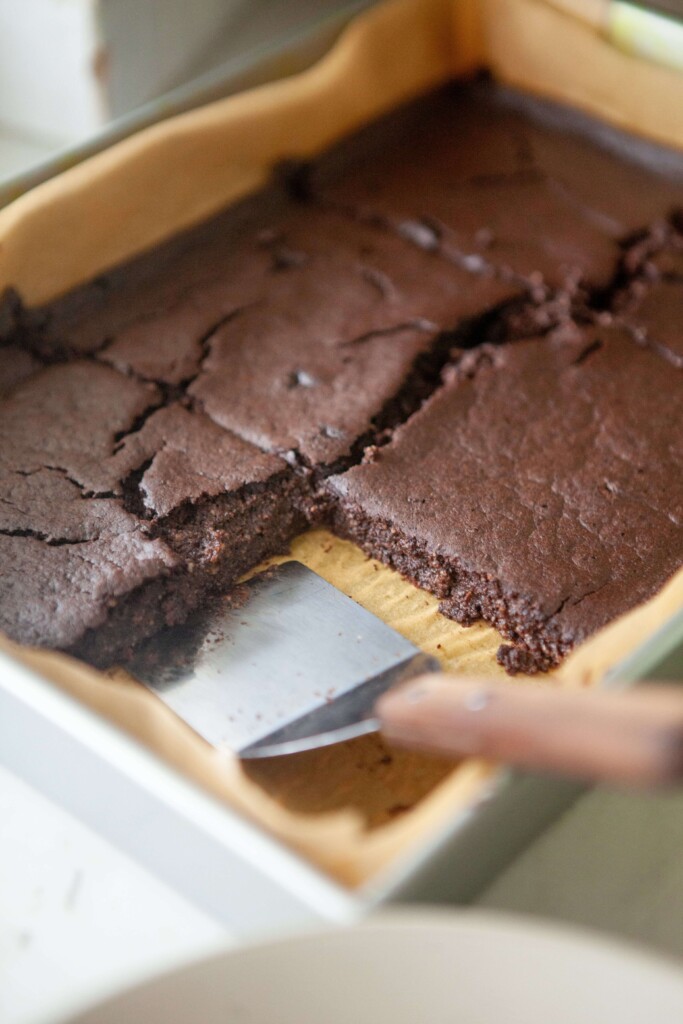
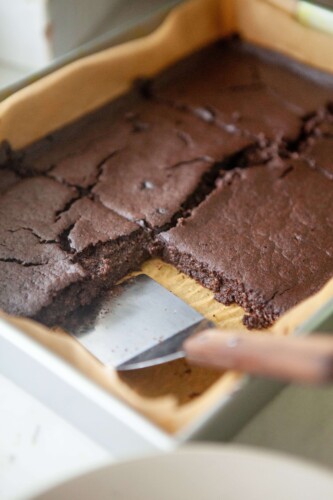
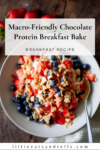
This Chocolate Protein Breakfast Bake is rich, fudgy, and packed thanks to the egg whites, cottage cheese, and chocolate protein powder. It’s perfect for an easy, meal prep-friendly breakfast or after-dinner sweet treat!
About This Recipe
If you’re craving something chocolatey for breakfast but still want to stay on track, this Chocolate Protein Breakfast Bake is about to become your new go-to. It’s rich, fudgy, and deeply chocolatey (almost like dessert!) but still made macro-friendly so you don’t blow all your calories in the beginning of the day!
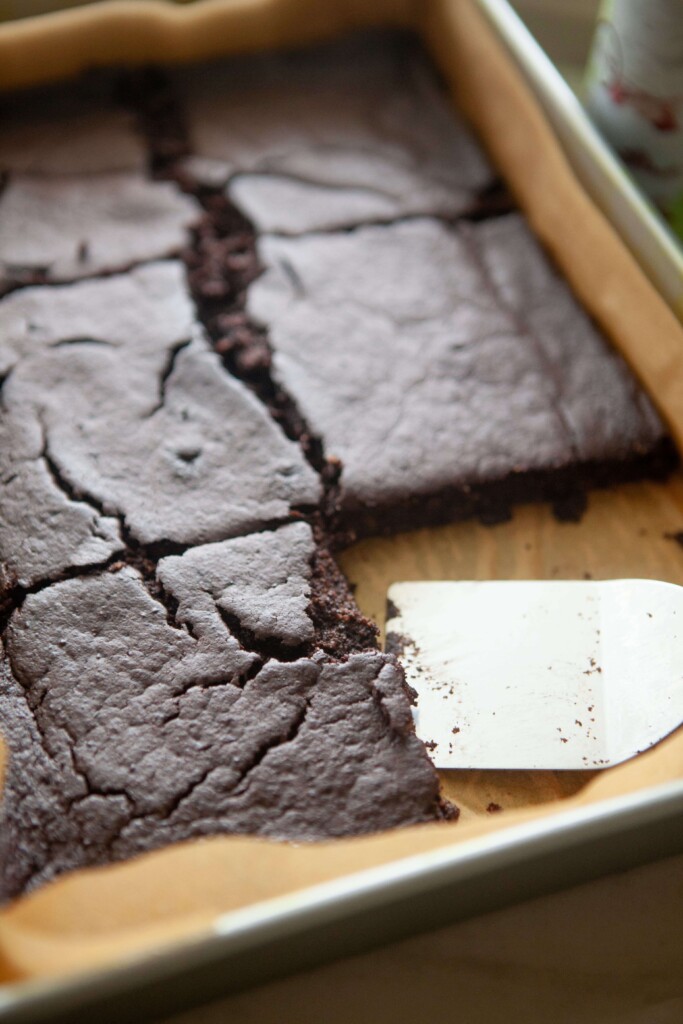
The best part about these breakfast bars? They’re SO easy to make. Just dump everything in a blender, blend, and bake!
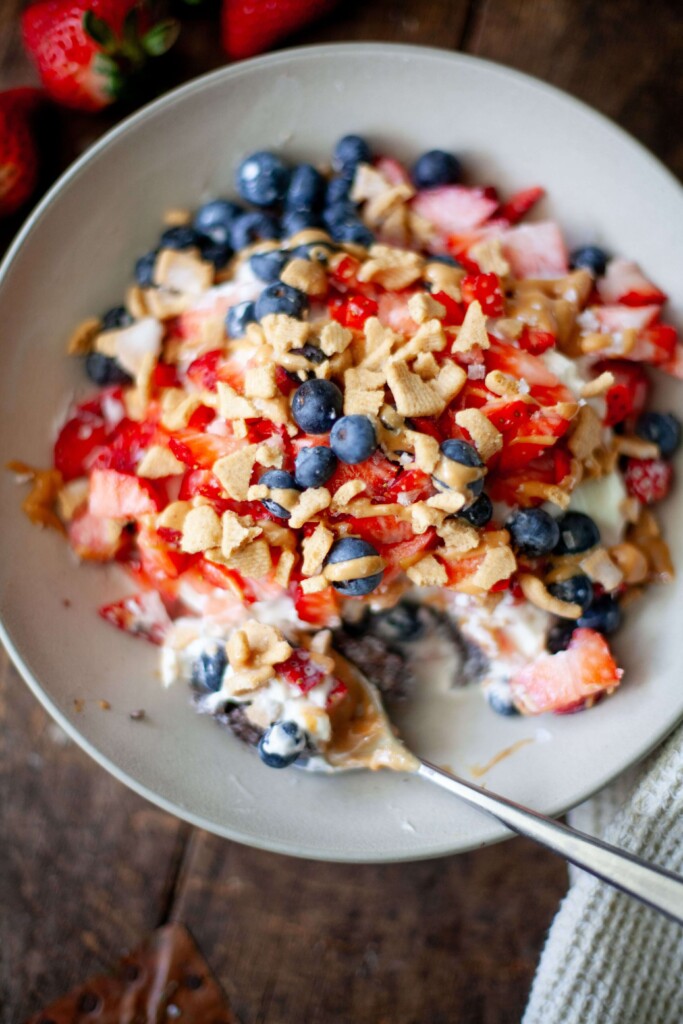
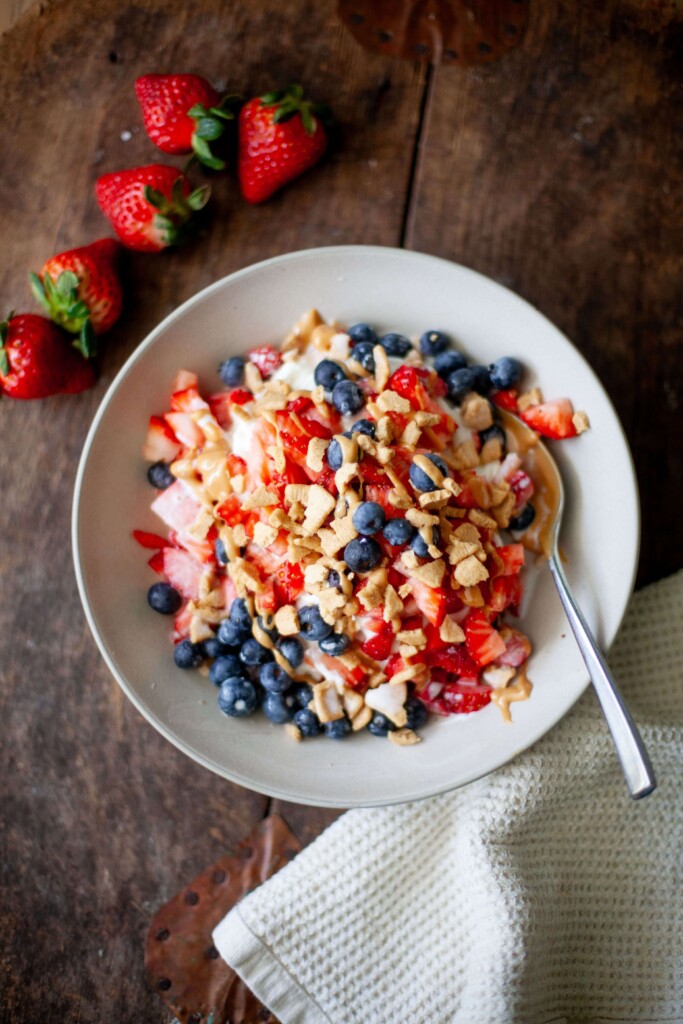
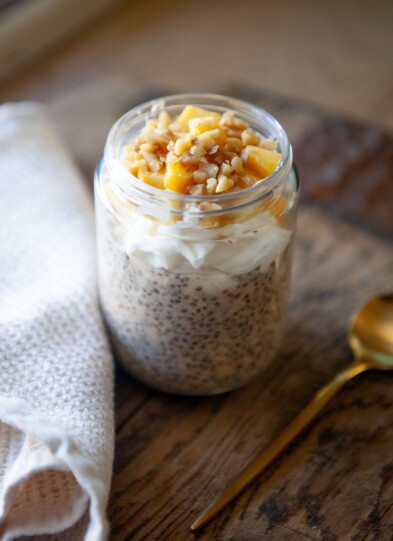
These chocolate protein breakfast bars are perfect for meal prep, easy to slice, and I honestly love them most served cold straight from the fridge. And don’t forget the toppings! These bars are light enough to top with your favorite toppings like whipped cream, fresh fruit, nut butters, or some yogurt for extra protein.
Whether you need a quick weekday breakfast or a satisfying post-workout option, this one checks all the boxes.
For more lightened-up sweet treats, try my Extra Light High-Protein Pumpkin Pie Breakfast Bars, Protein Pumpkin Chocolate Chip Bars, Healthy Chocolate Pumpkin Snack Cake, or Brownie Baked Squash Oats.
Ingredients and Substitutions
- Rolled oats: Rolled oats or old-fashioned oats are my preference for this breakfast bake. I love how hearty they are and make this more of a dense cake. You could also use quick oats but they will have a little lighter, fluffier, more cake-like texture. I do not recommend using steel-cut oats.
- Baking powder: Make sure it’s fresh (opened within 3 months!)
- Cashew milk (or other milk): Unsweetened SILK cashew milk is my go-to. Silk is my favorite because you can’t beat the macros, and it seems to make things a little creamier and thicker than other plant milks!
- Egg whites: A great way to add extra protein to these breakfast bars!
- Low-fat cottage cheese: Knudsen low-fat is my all-time favorite cottage cheese, but I know it’s not available everywhere. Good culture and Breakstone are other popular options!
- Protein powder: I used chocolate Active Stacks beef protein. I have to say, I MUCH prefer these made with the Active Stacks beef protein. It just yields a much denser and chewier texture, while the whey can quickly become too dry.
- Jet black cocoa powder: I love to use jet black cocoa powder to give these bars that really rich, dark chocolatey flavor, but you can use any cocoa powder you love!
- Vanilla extract: Adds the perfect amount of sweetness!
Dietary Adaptations
GF: Make sure to use gluten-free oats.
DF: To keep it dairy-free, I’d suggest swapping in dairy-free ricotta or yogurt for the cottage cheese, and be sure to use a dairy-free protein powder like this Active Stacks I love so much!
How To Make
- Preheat the oven to 350°F.
- Blend all ingredients together in a high-speed blender until smooth. Pour batter into a parchment-lined 9×13 casserole dish. Bake for 45 minutes, or until set. I consistently double this recipe and bake in a high sided sheet pan for 60 minutes. (If using whey protein instead of beef, bake for 35 minutes in a 9 x 13, and 50 minutes if you’re doubling. FYI: My favorite Active Stacks protein is superior in these. It yields a much more fudgy texture than whey protein. But of course, use what you have! But be sure to bake for a little less time. Use code LILLIE at checkout if you purchase!
- Top with whipped cream, fresh fruit, nut butters… or some yogurt for extra protein! Do not underestimate the importance of some of these toppings! It just totally transforms these for me into such a treat! (See the recipe card for exactly how I top my bowl!)
- Store in the fridge to enjoy throughout the week.
Helpful Tips
- Chill these bars: We love these especially when they’ve been chilled!
- Don’t underestimate the toppings: Top with whipped cream, fresh fruit, nut butters… or some yogurt for extra protein! Do not underestimate the importance of some of these toppings! It just totally transforms these for me into such a treat! Check out the recipe card for exactly how I top my bowl!
- Protein powder: I MUCH prefer these made with the Active Stacks beef protein (use code LILLIE to save). It just yields a much more dense and chewier texture, while the whey can quickly become too dry.
- Adjust baking time: Make sure to adjust the baking time depending on the dish and type of protein powder you use.I preferred about 45 minutes with my favorite Active Stacks, 35 minutes when I used my whey protein by Clean Simple Eats (use code LILLIE to save), and 60-65 minutes when I made 12 servings in a deep-sided sheet pan.
For More Delicious Breakfast Recipes
- Brownie Baked Squash Oats
- Extra Light High-Protein Pumpkin Pie Breakfast Bars
- Snickerdoodle Zucchini Baked Oats
- Pumpkin Pie Baked Protein Oat Bars
- Dark Chocolate Protein Waffles
- Vanilla Chia Pudding
- Microwave Brownie Zucchini Oats
Never Miss a Recipe! Sign Up for My Emails!
If you enjoy having macro-friendly recipes that are delicious and easy to track, then make sure to sign up for my email list!
Chocolate Protein Breakfast Bake
Ingredients
- 1½ cup rolled oats 161g
- 1½ tsp. baking powder
- 1/2 tsp. kosher salt
- 1½ cup cashew milk 360g, or other milk
- 3/4 cup liquid egg whites 180g
- 3/4 cup low-fat cottage cheese 180g
- 3/4 cup chocolate protein powder I used Active Stacks beef protein (90g)
- 3 Tbsp. jet black cocoa powder 15g
- 1 Tbsp. vanilla extract 15g
Instructions
- Preheat the oven to 350°F.
- Blend all ingredients together in a high-speed blender until smooth. Pour batter into a parchment-lined casserole dish (9×13 for 6-10 servings, and a sheet pan if making 12+ servings). Bake for 45 minutes, or until set. I consistently double this recipe and bake in a high sided sheet pan for 60 minutes. (If using whey protein instead of beef, bake for 35 minutes in a 9 x 13, and 50 minutes if you’re doubling. FYI: My favorite Active Stacks protein is superior in these. It yields a much more fudgy texture than whey protein. But of course, use what you have! But be sure to bake for a little less time.
- Top with whipped cream, fresh fruit, nut butters… or some yogurt for extra protein! Do not underestimate the importance of some of these toppings! It just totally transforms these for me into such a treat!
- The toppings are nonnegotiable for me. This is how I actually build my bowl: 150g square of the bake, ½ cup (120 g) nonfat or low-fat Greek yogurt (sweetened with a few drops of liquid Stevia. You can also use already sweetened vanilla Greek yogurt like Oikos triple zero), 20g of my favorite dairy-free whipped cream, 120g strawberries (diced small), 30g blueberries, 10g natural peanut butter (store it in the pantry instead of the fridge so it will drizzle!), 10g of crushed cinnamon toast Catalina crunch, and then I love to finish with a couple of tablespoons of my favorite Nut Pods almond milk creamer, and a good pinch of flake salt. I often even pour a bunch of almond milk over the top, but maybe that’s just me!Of course, you’ll log all of your toppings separately! But once you get it right, save it as a meal in your tracking app so that you can just log the same thing every time. My macros with the toppings included usually shakes out to about 455 calories | 50g carbs | 13g fat | 40g protein | 11g fiber
- Store in the fridge to enjoy throughout the week.
Notes
- GF: Make sure to use gluten-free oats.
- DF: To keep it dairy-free, I’d suggest swapping in dairy-free ricotta or yogurt for the cottage cheese, and be sure to use a dairy-free protein powder like this Active Stacks (use code LILLIE to save) I love so much!
- Chill these bars: We love these especially when they’ve been chilled!
- Don’t underestimate the toppings: Top with whipped cream, fresh fruit, nut butters… or some yogurt for extra protein! Do not underestimate the importance of some of these toppings! It just totally transforms these for me into such a treat!
- Protein powder: I MUCH prefer these made with the Active Stacks beef protein (use code LILLIE to save). It just yields a much more dense and chewier texture, while the whey can quickly become too dry.
- Adjust baking time: Make sure to adjust the baking time depending on the dish and type of protein powder you use. I preferred about 45 minutes with my favorite Active Stacks, 35 minutes when I used my whey protein by Clean Simple Eats (use code LILLIE to save), and 60-65 minutes when I made 12 servings in a deep-sided sheet pan.
- Search Lillie Eats and Tells Chocolate Protein Breakfast Bake
Nutrition
Tried this recipe?
Tag @LillieEatsAndTells on Instagram with #LillieEatsandTells! We’d love to see your creations!


Love it! I made a few tweaks though. Jet black cocoa can lack the chocolate flavor people might expect. Think of it more as oreo flavor than cocoa. The solution: mix with cocoa powder or completely replace with cocoa powder. Just know the color of the final product will be lighter. I doubled the recipe and added 2 tsp vanilla, 1 TBS of instant coffee (to enhance the chocolate flavor), 2 TBS of monk fruit/allulose blend sweetener, and then sprinkled with Trader Joes No Sugar Dark Chocolate Chips (made with allulose).
Next time I will try using half oats and half almond flour to reduce the carbs.
I might also experiment with adding flavorings like cocoa extract.
Thank you for a great recipe and happy treat!
The toppings transform it. Thanks for sharing your magic!
Im obsessed! These are amazing! Topped with yogurt and berries they feel like a dessert for breakfast! I liked them on their own as well, super fudgey and chocolately! Mine baked fast so watch them carefully!
This has become my favorite breakfast! I honestly get bummed on the days I don’t have it. I was introduced to the Active Stacks Chocolate Protein Powder through this blog when I first tried the nightly shakes, and the flavor is amazing — personally, it’s a must for this recipe.
I’d also say this recipe really shines with the toppings. On its own it’s ok, but with berries, a splash of almond milk, and some whipped cream, it’s so so good. Definitely something I look forward to every morning!
Going on a trip in a couple days and want to make a batch, but wouldn’t want to have to throw any away. Wondering if this could be frozen?
Thanks for sharing this recipe!! ❤️
My breakfast necessity now! I make a big portion of these every weekend for the week. My 16 year old son and I LOVE it. Our favorite toppings are blueberries, strawberries, drizzle of nut butter, Reddiwhip, and almond milk. So good!
This is amazing, with or without toppings. Here is why:it is a very delicious treat you can enjoy at all times -breakfast, or snack, while FEELING good about what you are eating. That is a hard combo, and this simply nails it.
Without topping this is a big no. BUT with toppings this is one of my favorite Lillie recipes. Even my picky husband asks for it. We eat it cold with bananas/peanut butter drizzle/granola/vanilla creamer drizzle or with raspberry chia jam/whipped cream. I’m a sweet breakfast person and this helps me start my day right.
Don’t sleep on these! I struggle with what to eat for lunch most days, and these are a perfect fit. I bake them and pre-portion them out and throw them in the fridge. Guilt free and great to customize with your own toppings. If you didn’t like them at first, try them chilled, trust me!
As Lillie says this is gross warm. I was about to toss it, but thankful I didn’t because chilled and with the toppings it is a winner.
This needs some maple syrup or Stevia or some sweetener baked in because without toppings it is un edible
Not for me without toppings.